02 February 2019
01 February 2019
28 January 2019
How To Install MySQL on Ubuntu
How To Install MySQL on Ubuntu 16.04
Introduction
MySQL is an open-source database management system, commonly installed as part of the popular LAMP (Linux, Apache, MySQL, PHP/Python/Perl) stack. It uses a relational database and SQL (Structured Query Language) to manage its data.The short version of the installation is simple: update your package index, install the
mysql-server package, and then run the included security script.
- sudo apt-get update
- sudo apt-get install mysql-server
- mysql_secure_installation
Prerequisites
To follow this tutorial, you will need:- One Ubuntu 16.04 server set up by following this initial server setup guide, including a sudo non-root user and a firewall.
Step 1 — Installing MySQL
On Ubuntu 16.04, only the latest version of MySQL is included in the APT package repository by default. At the time of writing, that's MySQL 5.7To install it, simply update the package index on your server and install the default package with
apt-get.
- sudo apt-get update
- sudo apt-get install mysql-server
Step 2 — Configuring MySQL
For fresh installations, you'll want to run the included security script. This changes some of the less secure default options for things like remote root logins and sample users. On older versions of MySQL, you needed to initialize the data directory manually as well, but this is done automatically now.Run the security script.
- mysql_secure_installation
Y and then ENTER to accept the defaults for all the subsequent questions, with the exception of the one that asks if you'd like to change the root password. You just set it in Step 1, so you don't have to change it now. For a more detailed walkthrough of these options, you can see this step of the LAMP installation tutorial.To initialize the MySQL data directory, you would use
mysql_install_db for versions before 5.7.6, and mysqld --initialize for 5.7.6 and later. However, if you installed MySQL from the Debian distribution, like in Step 1, the data directory was initialized automatically; you don't have to do anything. If you try running the command anyway, you'll see the following error:
Output
2016-03-07T20:11:15.998193Z 0 [ERROR] --initialize specified but the data directory has files in it. Aborting.
Step 3 — Testing MySQL
Regardless of how you installed it, MySQL should have started running automatically. To test this, check its status.
- systemctl status mysql.service
Output
● mysql.service - MySQL Community Server
   Loaded: loaded (/lib/systemd/system/mysql.service; enabled; vendor preset: en
   Active: active (running) since Wed 2016-11-23 21:21:25 UTC; 30min ago
 Main PID: 3754 (mysqld)
    Tasks: 28
   Memory: 142.3M
      CPU: 1.994s
   CGroup: /system.slice/mysql.service
           └─3754 /usr/sbin/mysqld
sudo systemctl start mysql.For an additional check, you can try connecting to the database using the
mysqladmin tool, which is a client that lets you run administrative commands. For example, this command says to connect to MySQL as root (-u root), prompt for a password (-p), and return the version.
- mysqladmin -p -u root version
Output
mysqladmin  Ver 8.42 Distrib 5.7.16, for Linux on x86_64
Copyright (c) 2000, 2016, Oracle and/or its affiliates. All rights reserved.

Oracle is a registered trademark of Oracle Corporation and/or its
affiliates. Other names may be trademarks of their respective
owners.

Server version      5.7.16-0ubuntu0.16.04.1
Protocol version    10
Connection      Localhost via UNIX socket
UNIX socket     /var/run/mysqld/mysqld.sock
Uptime:         30 min 54 sec

Threads: 1  Questions: 12  Slow queries: 0  Opens: 115  Flush tables: 1  Open tables: 34  Queries per second avg: 0.006
How To Install Apache Tomcat 8 on Ubuntu
How To Install Apache Tomcat 8 on Ubuntu 16.04
Introduction
Apache Tomcat is a web server and servlet container that is used to serve Java applications. Tomcat is an open source implementation of the Java Servlet and JavaServer Pages technologies, released by the Apache Software Foundation. This tutorial covers the basic installation and some configuration of the latest release of Tomcat 8 on your Ubuntu 16.04 server.Prerequisites
Before you begin with this guide, you should have a non-root user withsudo privileges set up on your server. You can learn how to do this by completing our Ubuntu 16.04 initial server setup guide.Step 1: Install Java
Tomcat requires Java to be installed on the server so that any Java web application code can be executed. We can satisfy that requirement by installing OpenJDK with apt-get.First, update your apt-get package index:
- sudo apt-get update
- sudo apt-get install default-jdk
tomcat user, which will be used to run the Tomcat service.Step 2: Create Tomcat User
For security purposes, Tomcat should be run as an unprivileged user (i.e. not root). We will create a new user and group that will run the Tomcat service.First, create a new
tomcat group:
- sudo groupadd tomcat
tomcat user. We'll make this user a member of the tomcat group, with a home directory of /opt/tomcat (where we will install Tomcat), and with a shell of /bin/false (so nobody can log into the account):
- sudo useradd -s /bin/false -g tomcat -d /opt/tomcat tomcat
tomcat user is set up, let's download and install Tomcat.Step 3: Install Tomcat
The best way to install Tomcat 8 is to download the latest binary release then configure it manually.Find the latest version of Tomcat 8 at the Tomcat 8 Downloads page. At the time of writing, the latest version is 8.5.5, but you should use a later stable version if it is available. Under the Binary Distributions section, then under the Core list, copy the link to the "tar.gz".
Next, change to the
/tmp directory on your server. This is a good directory to download ephemeral items, like the Tomcat tarball, which we won't need after extracting the Tomcat contents:
- cd /tmp
curl to download the link that you copied from the Tomcat website:
- curl -O http://apache.mirrors.ionfish.org/tomcat/tomcat-8/v8.5.5/bin/apache-tomcat-8.5.5.tar.gz
/opt/tomcat directory. Create the directory, then extract the archive to it with these commands:
- sudo mkdir /opt/tomcat
- sudo tar xzvf apache-tomcat-8*tar.gz -C /opt/tomcat --strip-components=1
Step 4: Update Permissions
Thetomcat user that we set up needs to have access to the Tomcat installation. We'll set that up now.Change to the directory where we unpacked the Tomcat installation:
- cd /opt/tomcat
tomcat group ownership over the entire installation directory:
- sudo chgrp -R tomcat /opt/tomcat
tomcat group read access to the conf directory and all of its contents, and execute access to the directory itself:
- sudo chmod -R g+r conf
- sudo chmod g+x conf
tomcat user the owner of the webapps, work, temp, and logs directories:
- sudo chown -R tomcat webapps/ work/ temp/ logs/
Step 5: Create a systemd Service File
We want to be able to run Tomcat as a service, so we will set up systemd service file.Tomcat needs to know where Java is installed. This path is commonly referred to as "JAVA_HOME". The easiest way to look up that location is by running this command:
- sudo update-java-alternatives -l
Output
java-1.8.0-openjdk-amd64       1081       /usr/lib/jvm/java-1.8.0-openjdk-amd64
JAVA_HOME variable can be constructed by taking the output from the last column (highlighted in red) and appending /jre to the end. Given the example above, the correct JAVA_HOME for this server would be:
JAVA_HOME
/usr/lib/jvm/java-1.8.0-openjdk-amd64/jre
JAVA_HOME may be different.With this piece of information, we can create the systemd service file. Open a file called
tomcat.service in the /etc/systemd/system directory by typing:
- sudo nano /etc/systemd/system/tomcat.service
JAVA_HOME if necessary to match the value you found on your system. You may also want to modify the memory allocation settings that are specified in CATALINA_OPTS:
/etc/systemd/system/tomcat.service
[Unit]
Description=Apache Tomcat Web Application Container
After=network.target

[Service]
Type=forking

Environment=JAVA_HOME=/usr/lib/jvm/java-1.8.0-openjdk-amd64/jre
Environment=CATALINA_PID=/opt/tomcat/temp/tomcat.pid
Environment=CATALINA_HOME=/opt/tomcat
Environment=CATALINA_BASE=/opt/tomcat
Environment='CATALINA_OPTS=-Xms512M -Xmx1024M -server -XX:+UseParallelGC'
Environment='JAVA_OPTS=-Djava.awt.headless=true -Djava.security.egd=file:/dev/./urandom'

ExecStart=/opt/tomcat/bin/startup.sh
ExecStop=/opt/tomcat/bin/shutdown.sh

User=tomcat
Group=tomcat
UMask=0007
RestartSec=10
Restart=always

[Install]
WantedBy=multi-user.target
Next, reload the systemd daemon so that it knows about our service file:
- sudo systemctl daemon-reload
- sudo systemctl start tomcat
- sudo systemctl status tomcat
Step 6: Adjust the Firewall and Test the Tomcat Server
Now that the Tomcat service is started, we can test to make sure the default page is available.Before we do that, we need to adjust the firewall to allow our requests to get to the service. If you followed the prerequisites, you will have a
ufw firewall enabled currently.Tomcat uses port
8080 to accept conventional requests. Allow traffic to that port by typing:
- sudo ufw allow 8080
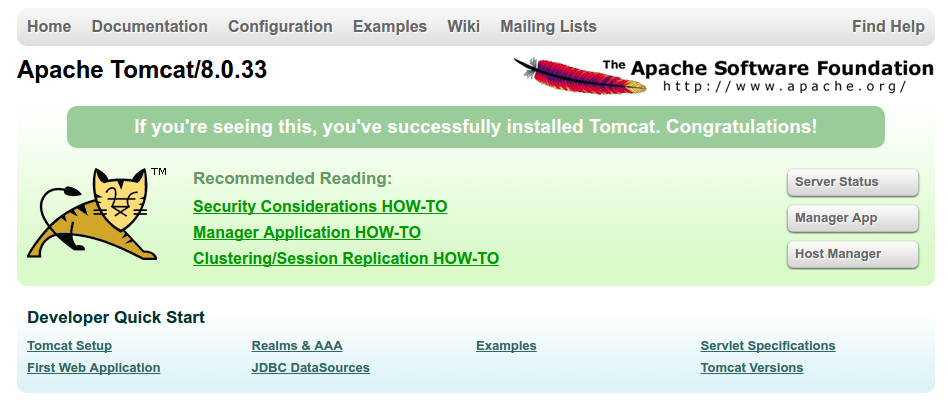
:8080 in a web browser:
Open in web browser
http://server_domain_or_IP:8080
If you were able to successfully accessed Tomcat, now is a good time to enable the service file so that Tomcat automatically starts at boot:
- sudo systemctl enable tomcat
Step 7: Configure Tomcat Web Management Interface
In order to use the manager web app that comes with Tomcat, we must add a login to our Tomcat server. We will do this by editing thetomcat-users.xml file:
- sudo nano /opt/tomcat/conf/tomcat-users.xml
manager-gui and admin-gui (web apps that come with Tomcat). You can do so by defining a user, similar to the example below, between the tomcat-users tags. Be sure to change the username and password to something secure:
tomcat-users.xml — Admin User
<tomcat-users . . .>
    <user username="admin" password="password" roles="manager-gui,admin-gui"/>
</tomcat-users>
By default, newer versions of Tomcat restrict access to the Manager and Host Manager apps to connections coming from the server itself. Since we are installing on a remote machine, you will probably want to remove or alter this restriction. To change the IP address restrictions on these, open the appropriate
context.xml files.For the Manager app, type:
- sudo nano /opt/tomcat/webapps/manager/META-INF/context.xml
- sudo nano /opt/tomcat/webapps/host-manager/META-INF/context.xml
context.xml files for Tomcat webapps
<Context antiResourceLocking="false" privileged="true" >
  <!--<Valve className="org.apache.catalina.valves.RemoteAddrValve"
         allow="127\.\d+\.\d+\.\d+|::1|0:0:0:0:0:0:0:1" />-->
</Context>
To put our changes into effect, restart the Tomcat service:
- sudo systemctl restart tomcat
Step 8: Access the Web Interface
Now that we have create a user, we can access the web management interface again in a web browser. Once again, you can get to the correct interface by entering your server's domain name or IP address followed on port 8080 in your browser:
Open in web browser
http://server_domain_or_IP:8080
http://server_domain_or_IP:8080/manager/html. You will need to enter the account credentials that you added to the tomcat-users.xml file. Afterwards, you should see a page that looks like this: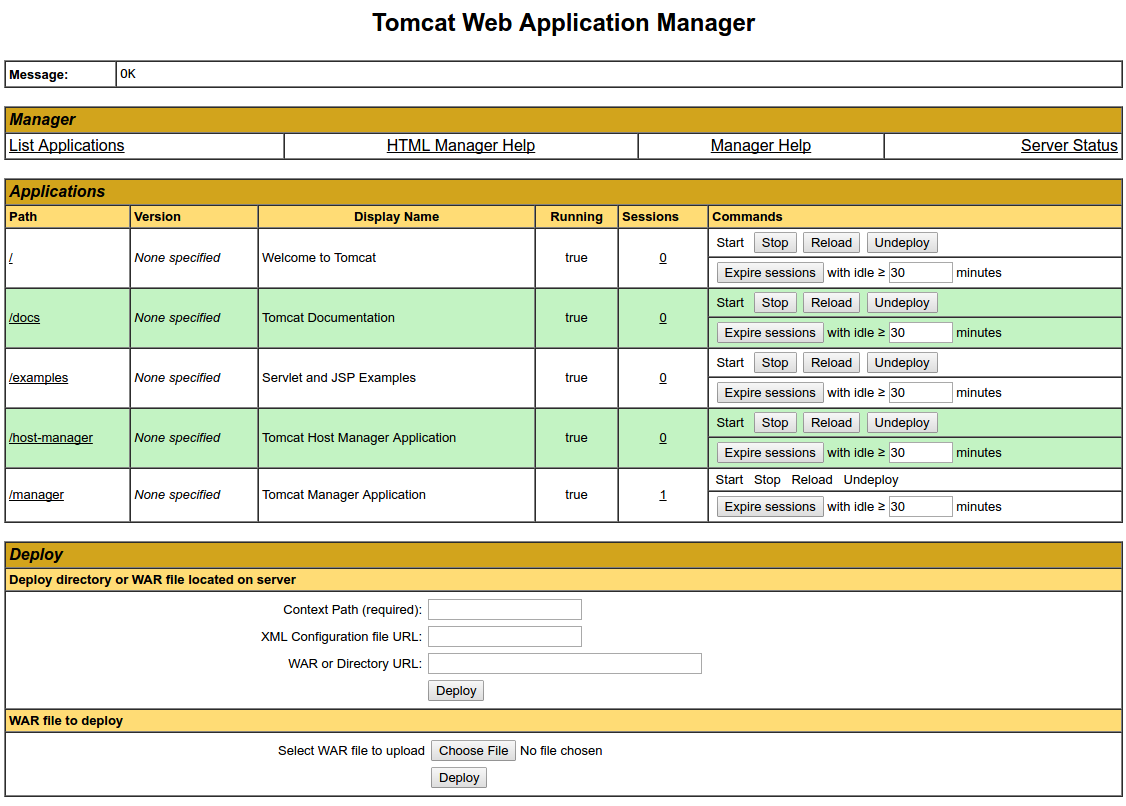
Now let's take a look at the Host Manager, accessible via the link or
http://server_domain_or_IP:8080/host-manager/html/: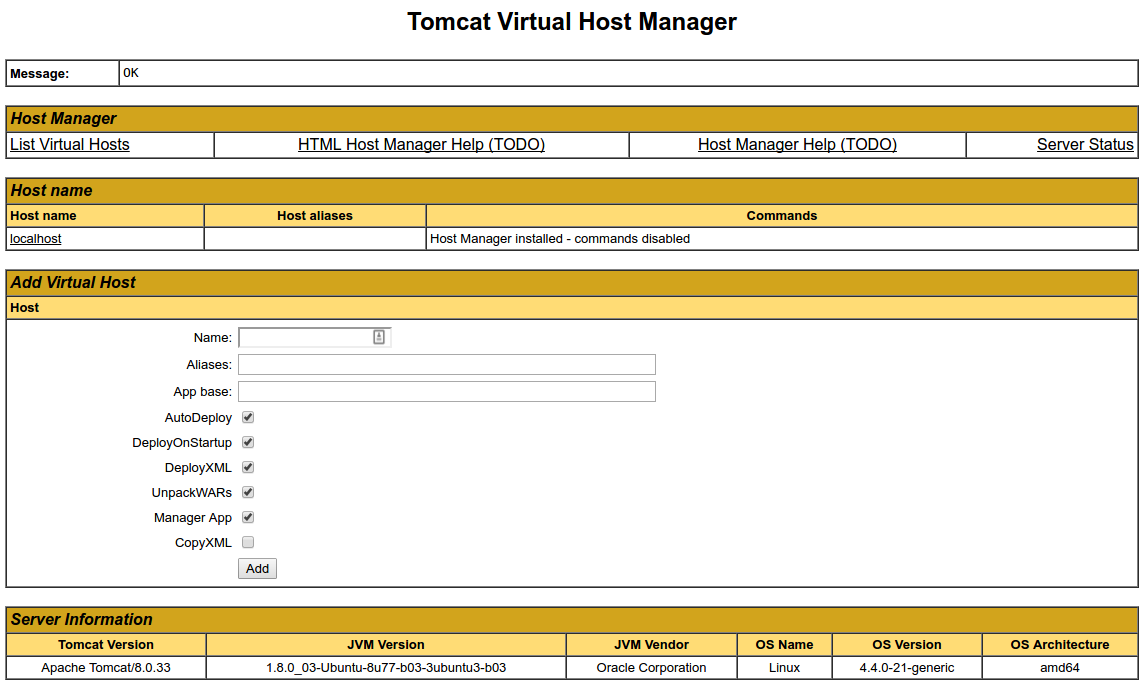
How To Install Linux, Apache, MySQL, PHP (LAMP) stack on Ubuntu
How To Install Linux, Apache, MySQL, PHP (LAMP) stack on Ubuntu 16.04

Introduction
A "LAMP" stack is a group of open source software that is typically installed together to enable a server to host dynamic websites and web apps. This term is actually an acronym which represents the Linux operating system, with the Apache web server. The site data is stored in a MySQL database, and dynamic content is processed by PHP.In this guide, we'll get a LAMP stack installed on an Ubuntu 16.04 Droplet. Ubuntu will fulfill our first requirement: a Linux operating system.
Prerequisites
Before you begin with this guide, you should have a separate, non-root user account withsudo privileges set up on your server. You can learn how to do this by completing steps 1-4 in the initial server setup for Ubuntu 16.04.Step 1: Install Apache and Allow in Firewall
The Apache web server is among the most popular web servers in the world. It's well-documented, and has been in wide use for much of the history of the web, which makes it a great default choice for hosting a website.We can install Apache easily using Ubuntu's package manager,
apt. A package manager allows us to install most software pain-free from a repository maintained by Ubuntu. You can learn more about how to use apt here.For our purposes, we can get started by typing these commands:
- sudo apt-get update
- sudo apt-get install apache2
sudo command, these operations get executed with root privileges. It will ask you for your regular user's password to verify your intentions.Once you've entered your password,
apt will tell you which packages it plans to install and how much extra disk space they'll take up. Press Y and hit Enter to continue, and the installation will proceed.Set Global ServerName to Suppress Syntax Warnings
Next, we will add a single line to the/etc/apache2/apache2.conf file to suppress a warning message. While harmless, if you do not set ServerName globally, you will receive the following warning when checking your Apache configuration for syntax errors:
- sudo apache2ctl configtest
Output
AH00558: apache2: Could not reliably determine the server's fully qualified domain name, using 127.0.1.1. Set the 'ServerName' directive globally to suppress this message
Syntax OK
- sudo nano /etc/apache2/apache2.conf
ServerName directive, pointing to your primary domain name. If you do not have a domain name associated with your server, you can use your server's public IP address:
Note
If you don't know your server's IP address, skip down to the section on how to find your server's public IP address to find it.
/etc/apache2/apache2.conf
. . .
ServerName server_domain_or_IP
Next, check for syntax errors by typing:
- sudo apache2ctl configtest
ServerName directive, all you should see is:
Output
Syntax OK
- sudo systemctl restart apache2
Adjust the Firewall to Allow Web Traffic
Next, assuming that you have followed the initial server setup instructions to enable the UFW firewall, make sure that your firewall allows HTTP and HTTPS traffic. You can make sure that UFW has an application profile for Apache like so:
- sudo ufw app list
Output
Available applications:
  Apache
  Apache Full
  Apache Secure
  OpenSSH
Apache Full profile, it should show that it enables traffic to ports 80 and 443:
- sudo ufw app info "Apache Full"
Output
Profile: Apache Full
Title: Web Server (HTTP,HTTPS)
Description: Apache v2 is the next generation of the omnipresent Apache web
server.

Ports:
  80,443/tcp
- sudo ufw allow in "Apache Full"
http://your_server_IP_address
How To Find your Server's Public IP Address
If you do not know what your server's public IP address is, there are a number of ways you can find it. Usually, this is the address you use to connect to your server through SSH.From the command line, you can find this a few ways. First, you can use the
iproute2 tools to get your address by typing this:
- ip addr show eth0 | grep inet | awk '{ print $2; }' | sed 's/\/.*$//'
An alternative method is to use the
curl utility to contact an outside party to tell you how it sees your server. You can do this by asking a specific server what your IP address is:
- sudo apt-get install curl
- curl http://icanhazip.com
Step 2: Install MySQL
Now that we have our web server up and running, it is time to install MySQL. MySQL is a database management system. Basically, it will organize and provide access to databases where our site can store information.Again, we can use
apt to acquire and install our software. This time, we'll also install some other "helper" packages that will assist us in getting our components to communicate with each other:
- sudo apt-get install mysql-server
sudo apt-get update prior to the command. This is because we recently ran it in the commands above to install Apache. The package index on our computer should already be up-to-date.Again, you will be shown a list of the packages that will be installed, along with the amount of disk space they'll take up. Enter Y to continue.
During the installation, your server will ask you to select and confirm a password for the MySQL "root" user. This is an administrative account in MySQL that has increased privileges. Think of it as being similar to the root account for the server itself (the one you are configuring now is a MySQL-specific account, however). Make sure this is a strong, unique password, and do not leave it blank.
When the installation is complete, we want to run a simple security script that will remove some dangerous defaults and lock down access to our database system a little bit. Start the interactive script by running:
- mysql_secure_installation
VALIDATE PASSWORD PLUGIN.Warning: Enabling this feature is something of a judgment call. If enabled, passwords which don't match the specified criteria will be rejected by MySQL with an error. This will cause issues if you use a weak password in conjunction with software which automatically configures MySQL user credentials, such as the Ubuntu packages for phpMyAdmin. It is safe to leave validation disabled, but you should always use strong, unique passwords for database credentials.
Answer y for yes, or anything else to continue without enabling.
VALIDATE PASSWORD PLUGIN can be used to test passwords
and improve security. It checks the strength of password
and allows the users to set only those passwords which are
secure enough. Would you like to setup VALIDATE PASSWORD plugin?

Press y|Y for Yes, any other key for No:
There are three levels of password validation policy:

LOW    Length >= 8
MEDIUM Length >= 8, numeric, mixed case, and special characters
STRONG Length >= 8, numeric, mixed case, special characters and dictionary                  file

Please enter 0 = LOW, 1 = MEDIUM and 2 = STRONG: 1
Using existing password for root.

Estimated strength of the password: 100
Change the password for root ? ((Press y|Y for Yes, any other key for No) : n
At this point, your database system is now set up and we can move on.
Step 3: Install PHP
PHP is the component of our setup that will process code to display dynamic content. It can run scripts, connect to our MySQL databases to get information, and hand the processed content over to our web server to display.We can once again leverage the
apt system to install our components. We're going to include some helper packages as well, so that PHP code can run under the Apache server and talk to our MySQL database:
- sudo apt-get install php libapache2-mod-php php-mcrypt php-mysql
In most cases, we'll want to modify the way that Apache serves files when a directory is requested. Currently, if a user requests a directory from the server, Apache will first look for a file called
index.html. We want to tell our web server to prefer PHP files, so we'll make Apache look for an index.php file first.To do this, type this command to open the
dir.conf file in a text editor with root privileges:
- sudo nano /etc/apache2/mods-enabled/dir.conf
/etc/apache2/mods-enabled/dir.conf
<IfModule mod_dir.c>
    DirectoryIndex index.html index.cgi index.pl index.php index.xhtml index.htm
</IfModule>
DirectoryIndex specification, like this:
/etc/apache2/mods-enabled/dir.conf
<IfModule mod_dir.c>
    DirectoryIndex index.php index.html index.cgi index.pl index.xhtml index.htm
</IfModule>
After this, we need to restart the Apache web server in order for our changes to be recognized. You can do this by typing this:
- sudo systemctl restart apache2
apache2 service using systemctl:
- sudo systemctl status apache2
Sample Output
● apache2.service - LSB: Apache2 web server
   Loaded: loaded (/etc/init.d/apache2; bad; vendor preset: enabled)
  Drop-In: /lib/systemd/system/apache2.service.d
           └─apache2-systemd.conf
   Active: active (running) since Wed 2016-04-13 14:28:43 EDT; 45s ago
     Docs: man:systemd-sysv-generator(8)
  Process: 13581 ExecStop=/etc/init.d/apache2 stop (code=exited, status=0/SUCCESS)
  Process: 13605 ExecStart=/etc/init.d/apache2 start (code=exited, status=0/SUCCESS)
    Tasks: 6 (limit: 512)
   CGroup: /system.slice/apache2.service
           ├─13623 /usr/sbin/apache2 -k start
           ├─13626 /usr/sbin/apache2 -k start
           ├─13627 /usr/sbin/apache2 -k start
           ├─13628 /usr/sbin/apache2 -k start
           ├─13629 /usr/sbin/apache2 -k start
           └─13630 /usr/sbin/apache2 -k start

Apr 13 14:28:42 ubuntu-16-lamp systemd[1]: Stopped LSB: Apache2 web server.
Apr 13 14:28:42 ubuntu-16-lamp systemd[1]: Starting LSB: Apache2 web server...
Apr 13 14:28:42 ubuntu-16-lamp apache2[13605]:  * Starting Apache httpd web server apache2
Apr 13 14:28:42 ubuntu-16-lamp apache2[13605]: AH00558: apache2: Could not reliably determine the server's fully qualified domain name, using 127.0.1.1. Set the 'ServerNam
Apr 13 14:28:43 ubuntu-16-lamp apache2[13605]:  *
Apr 13 14:28:43 ubuntu-16-lamp systemd[1]: Started LSB: Apache2 web server.
Install PHP Modules
To enhance the functionality of PHP, we can optionally install some additional modules.To see the available options for PHP modules and libraries, you can pipe the results of
apt-cache search into less, a pager which lets you scroll through the output of other commands:
- apt-cache search php- | less
The results are all optional components that you can install. It will give you a short description for each:
libnet-libidn-perl - Perl bindings for GNU Libidn
php-all-dev - package depending on all supported PHP development packages
php-cgi - server-side, HTML-embedded scripting language (CGI binary) (default)
php-cli - command-line interpreter for the PHP scripting language (default)
php-common - Common files for PHP packages
php-curl - CURL module for PHP [default]
php-dev - Files for PHP module development (default)
php-gd - GD module for PHP [default]
php-gmp - GMP module for PHP [default]
…
:
- apt-cache show package_name
Description-en which will have a longer explanation of the functionality that the module provides.For example, to find out what the
php-cli module does, we could type this:
- apt-cache show php-cli
Output
…
Description-en: command-line interpreter for the PHP scripting language (default)
 This package provides the /usr/bin/php command interpreter, useful for
 testing PHP scripts from a shell or performing general shell scripting tasks.
 .
 PHP (recursive acronym for PHP: Hypertext Preprocessor) is a widely-used
 open source general-purpose scripting language that is especially suited
 for web development and can be embedded into HTML.
 .
 This package is a dependency package, which depends on Debian's default
 PHP version (currently 7.0).
…
apt-get install command like we have been doing for our other software.If we decided that
php-cli is something that we need, we could type:
- sudo apt-get install php-cli
apt-get install command, like this:
- sudo apt-get install package1 package2 ...
Step 4: Test PHP Processing on your Web Server
In order to test that our system is configured properly for PHP, we can create a very basic PHP script.We will call this script
info.php. In order for Apache to find the file and serve it correctly, it must be saved to a very specific directory, which is called the "web root".In Ubuntu 16.04, this directory is located at
/var/www/html/. We can create the file at that location by typing:
- sudo nano /var/www/html/info.php
info.php
<?php
phpinfo();
?>
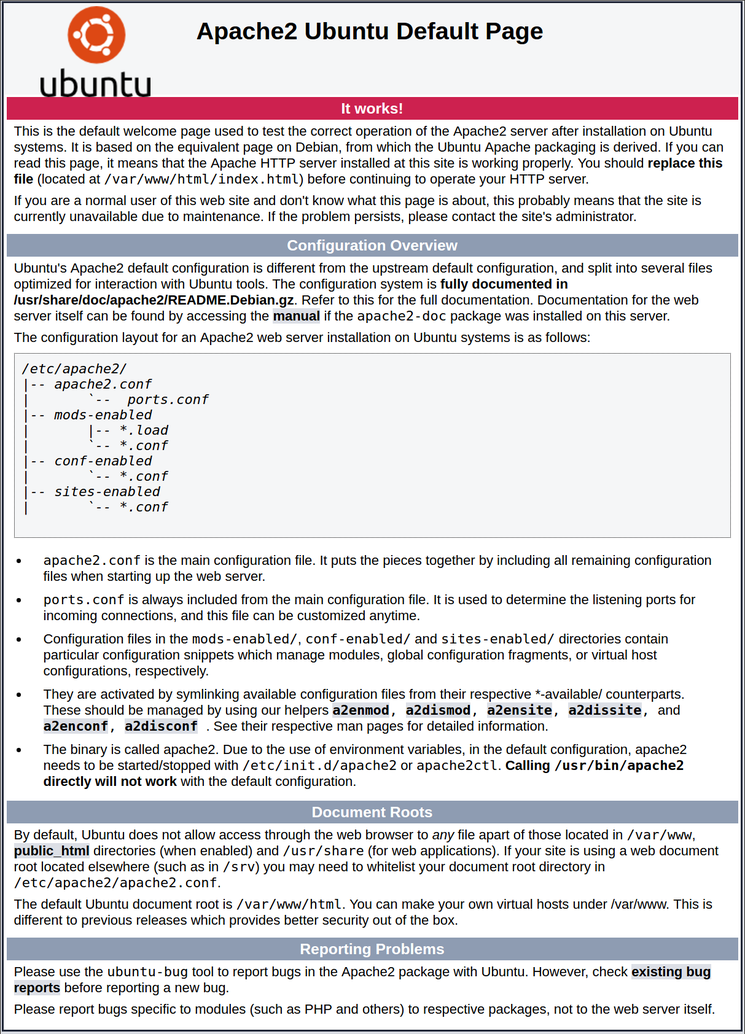
Now we can test whether our web server can correctly display content generated by a PHP script. To try this out, we just have to visit this page in our web browser. You'll need your server's public IP address again.
The address you want to visit will be:
http://your_server_IP_address/info.php
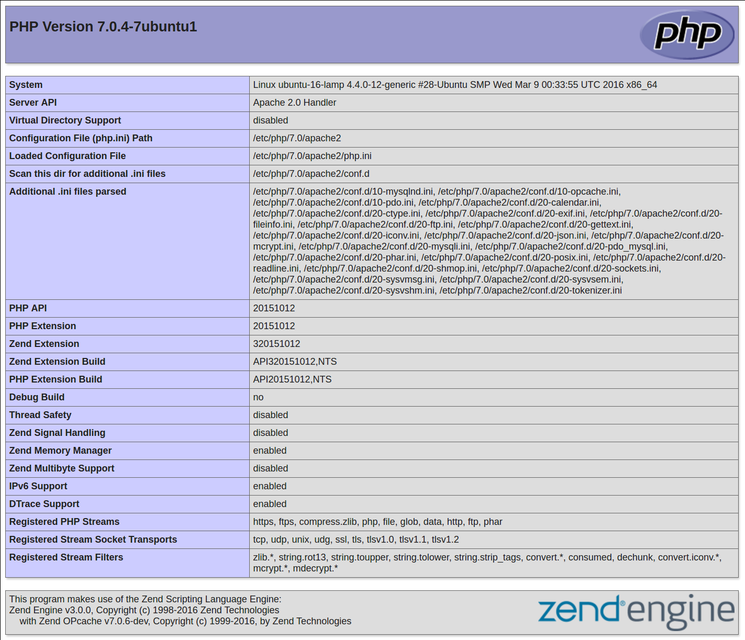
This page basically gives you information about your server from the perspective of PHP. It is useful for debugging and to ensure that your settings are being applied correctly.
If this was successful, then your PHP is working as expected.
You probably want to remove this file after this test because it could actually give information about your server to unauthorized users. To do this, you can type this:
- sudo rm /var/www/html/info.php
How to Install and Configure Postfix as a Send-Only SMTP Server on Ubuntu
How to Install and Configure Postfix as a Send-Only SMTP Server on Ubuntu 16.04

Introduction
Postfix is a mail transfer agent (MTA), an application used to send and receive email. In this tutorial, we will install and configure Postfix so that it can be used to send emails by local applications only — that is, those installed on the same server that Postfix is installed on.Why would you want to do that?
If you're already using a third-party email provider for sending and receiving emails, you do not need to run your own mail server. However, if you manage a cloud server on which you have installed applications that need to send email notifications, running a local, send-only SMTP server is a good alternative to using a 3rd party email service provider or running a full-blown SMTP server.
In this tutorial, you'll learn how to install and configure Postfix as a send-only SMTP server.
Prerequisites
To follow this tutorial, you will need:- One Ubuntu 16.04 Droplet set up with the Ubuntu 16.04 initial setup guide, including creating a sudo non-root user
- A valid domain name, like
example.com, pointing to your server. You can set that up by following this host name tutorial
hostname at the command prompt. The output should match the name you gave the Droplet when it was being created.Step 1 — Installing Postfix
In this step, you'll learn how to install Postfix. The most efficient way to install Postfix and other programs needed for testing email is to install themailutils package.First, update the package database:
- sudo apt-get update
mailtuils will install Postfix as well as a few other programs needed for Postfix to function.
- sudo apt install mailutils
TAB, then ENTER.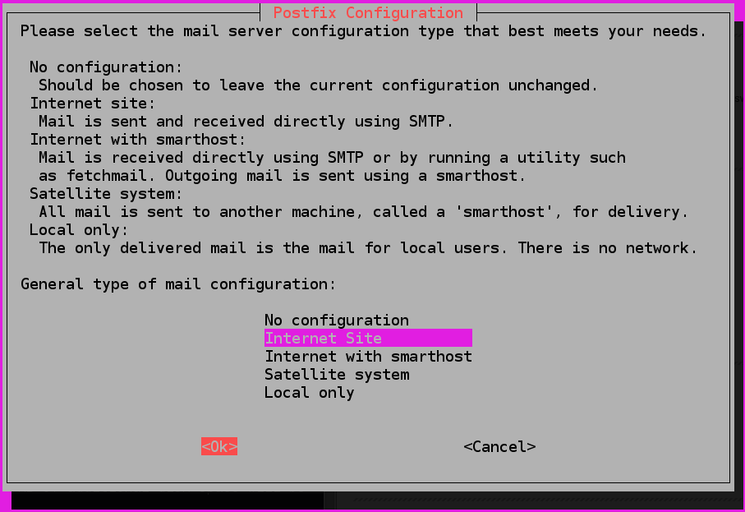
After that, you'll get another window just like the one in the next image. The System mail name should be the same as the name you assigned to the server when you were creating it. If it shows a subdomain like
subdomain.example.com, change it to just example.com. When you've finished, press TAB, then ENTER.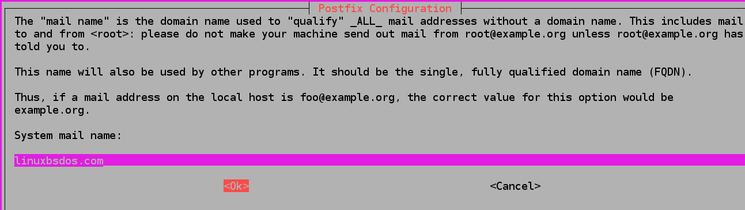
After installation has completed successfully, proceed to step two.
Step 2 — Configuring Postfix
In this step, you'll read how to configure Postfix to process requests to send emails only from the server on which it is running, that is, from localhost.For that to happen, Postfix needs to be configured to listen only on the loopback interface, the virtual network interface that the server uses to communicate internally. To make the change, open the main Postfix configuration file using
nano or your favorite text editor.
- sudo nano /etc/postfix/main.cf
/etc/postfix/main.cf
. . .
mailbox_size_limit = 0
recipient_delimiter = +
inet_interfaces = all
. . .
inet_interfaces = all to inet_interfaces = loopback-only.
/etc/postfix/main.cf
. . .
mailbox_size_limit = 0
recipient_delimiter = +
inet_interfaces = loopback-only
. . .
mydestination, which is used to specify the list of domains that are delivered via the local_transport mail delivery transport. By default, the values are similar to these:
/etc/postfix/main.cf
. . .
mydestination = $myhostname, example.com, localhost.com, , localhost
. . .
/etc/postfix/main.cf
. . .
mydestination = $myhostname, localhost.$mydomain, $mydomain
. . .
If you're hosting multiple domains on a single server, the other domains can also be passed to Postfix using the
mydestination directive. However, to configure Postfix in a manner that scales and that does not present issues for such a setup involves additional configurations that are beyond the scope of this article.Finally, restart Postfix.
- sudo systemctl restart postfix
Step 3 — Testing the SMTP Server
In this step, you'll test whether Postfix can send emails to an external email account using themail command, which is part of the mailutils package that was installed in Step 1.To send a test email, type:
- echo "This is the body of the email" | mail -s "This is the subject line" your_email_address
your_email_address, use a valid email address. The domain part can be gmail.com, fastmail.com, yahoo.com, or any other email service provider that you use.Now check the email address where you sent the test message. You should see the message in your inbox. If not, check your spam folder.
Note that with this configuration, the address in the From field for the test emails you send will be
sammy@example.com, where sammy is your Linux username and the domain part is the server's hostname. If you change your username, the From address will also change.Step 4 — Forwarding System Mail
The last thing we want to set up is forwarding, so you'll get emails sent to root on the system at your personal, external email address.To configure Postfix so that system-generated emails will be sent to your email address, you need to edit the
/etc/aliases file.
- sudo nano /etc/aliases
/etc/aliases
# See man 5 aliases for format
postmaster:    root
/etc/aliases
# See man 5 aliases for format
postmaster:    root
root:          your_email_address
your_email_address with your personal email address. When finished, save and close the file. For the change to take effect, run the following command:
- sudo newaliases
- echo "This is the body of the email" | mail -s "This is the subject line" root
How To Install and Configure Postfix on Ubuntu
How To Install and Configure Postfix on Ubuntu

Introduction
Postfix is a popular open-source Mail Transfer Agent (MTA) that can be used to route and deliver email on a Linux system. It is estimated that around 25% of public mail servers on the internet run Postfix.In this guide, we'll teach you how to get up and running quickly with Postfix on an Ubuntu 16.04 server.
Prerequisites
In order to follow this guide, you should have access to a non-root user withsudo privileges. You can follow our Ubuntu 16.04 initial server setup guide to create the necessary user.In order to properly configure Postfix, you will need a Fully Qualified Domain Name pointed at your Ubuntu 16.04 server. You can find help on setting up your domain name with DigitalOcean by following this guide. If you plan on accepting mail, you will need to make sure you have an MX record pointing to your mail server as well.
For the purposes of this tutorial, we will assume that you are configuring a host that has the FQDN of
mail.example.com.Step 1: Install Postfix
Postfix is included in Ubuntu's default repositories, so installation is incredibly simple.To begin, update your local
apt package cache and then install the software. We will be passing in the DEBIAN_PRIORITY=low environmental variable into our installation command in order to answer some additional prompts:
- sudo apt-get update
- sudo DEBIAN_PRIORITY=low apt-get install postfix
- General type of mail configuration?: For this, we will choose Internet Site since this matches our infrastructure needs.
- System mail name: This is the base domain used to construct a valid email address when only the account portion of the address is given. For instance, the hostname of our server is
mail.example.com, but we probably want to set the system mail name toexample.comso that given the usernameuser1, Postfix will use the addressuser1@example.com. - Root and postmaster mail recipient: This is the Linux account that will be forwarded mail addressed to
root@andpostmaster@. Use your primary account for this. In our case, sammy. - Other destinations to accept mail for: This defines the mail destinations that this Postfix instance will accept. If you need to add any other domains that this server will be responsible for receiving, add those here, otherwise, the default should work fine.
- Force synchronous updates on mail queue?: Since you are likely using a journaled filesystem, accept No here.
- Local networks: This is a list of the networks that your mail server is configured to relay messages for. The default should work for most scenarios. If you choose to modify it, make sure to be very restrictive in regards to the network range.
- Mailbox size limit: This can be used to limit the size of messages. Setting it to "0" disables any size restriction.
- Local address extension character: This is the character that can be used to separate the regular portion of the address from an extension (used to create dynamic aliases).
- Internet protocols to use: Choose whether to restrict the IP version that Postfix supports. We'll pick "all" for our purposes.
- General type of mail configuration?: Internet Site
- System mail name: example.com (not mail.example.com)
- Root and postmaster mail recipient: sammy
- Other destinations to accept mail for: $myhostname, example.com, mail.example.com, localhost.example.com, localhost
- Force synchronous updates on mail queue?: No
- Local networks: 127.0.0.0/8 [::ffff:127.0.0.0]/104 [::1]/128
- Mailbox size limit: 0
- Local address extension character: +
- Internet protocols to use: all
- sudo dpkg-reconfigure postfix
When you are finished, we can now do a bit more configuration to set up our system how we'd like it.
Step 2: Tweak the Postfix Configuration
Next, we can adjust some settings that the package did not prompt us for.To begin, we can set the mailbox. We will use the Maildir format, which separates messages into individual files that are then moved between directories based on user action. The other option is the mbox format (which we won't cover here) which stores all messages within a single file.
We will set the
home_mailbox variable to Maildir/ which will create a directory structure under that name within the user's home directory. The postconf command can be used to query or set configuration settings. Configure home_mailbox by typing:
- sudo postconf -e 'home_mailbox= Maildir/'
virtual_alias_maps table. This table maps arbitrary email accounts to Linux system accounts. We will create this table at /etc/postfix/virtual. Again, we can use the postconf command:
- sudo postconf -e 'virtual_alias_maps= hash:/etc/postfix/virtual'
Step 3: Map Mail Addresses to Linux Accounts
Next, we can set up the virtual maps file. Open the file in your text editor:
- sudo nano /etc/postfix/virtual
For example, if you would like to accept email at
contact@example.com and admin@example.com and would like to have those emails delivered to the sammy Linux user, you could set up your file like this:
/etc/postfix/virtual
contact@example.com sammy
admin@example.com sammy
We can apply the mapping by typing:
- sudo postmap /etc/postfix/virtual
- sudo systemctl restart postfix
Step 4: Adjust the Firewall
If you are running the UFW firewall, as configured in the initial server setup guide, we'll have to allow an exception for Postfix.You can allow connections to the service by typing:
- sudo ufw allow Postfix
Step 5: Setting up the Environment to Match the Mail Location
Before we install a client, we should make sure ourMAIL environmental variable is set correctly. The client will inspect this variable to figure out where to look for user's mail.In order for the variable to be set regardless of how you access your account (through
ssh, su, su -, sudo, etc.) we need to set the variable in a few different locations. We'll add it to /etc/bash.bashrc and a file within /etc/profile.d to make sure each user has this configured.To add the variable to these files, type:
- echo 'export MAIL=~/Maildir' | sudo tee -a /etc/bash.bashrc | sudo tee -a /etc/profile.d/mail.sh
/etc/profile.d/mail.sh file:
- source /etc/profile.d/mail.sh
Step 6: Install and Configure the Mail Client
In order to interact with the mail being delivered, we will install thes-nail package. This is a variant of the BSD xmail client, which is feature-rich, can handle the Maildir format correctly, and is mostly backwards compatible. The GNU version of mail has some frustrating limitations, such as always saving read mail to the mbox format regardless of the source format.To install the
s-nail package, type:
- sudo apt-get install s-nail
/etc/s-nail.rc file in your editor:
- sudo nano /etc/s-nail.rc
/etc/s-nail.rc
. . .
set emptystart
set folder=Maildir
set record=+sent
Maildir directory to the internal folder variable and then use this to create a sent mbox file within that, for storing sent mail.Save and close the file when you are finished.
Step 7: Initialize the Maildir and Test the Client
Now, we can test the client out.Initializing the Directory Structure
The easiest way to create the Maildir structure within our home directory is to send ourselves an email. We can do this with themail command. Because the sent file will only be available once the Maildir is created, we should disable writing to that for our initial email. We can do this by passing the -Snorecord option.Send the email by piping a string to the
mail command. Adjust the command to mark your Linux user as the recipient:
- echo 'init' | mail -s 'init' -Snorecord sammy
Output
Can't canonicalize "/home/sammy/Maildir"
~/Maildir directory:
- ls -R ~/Maildir
~/Maildir/new directory:
Output
/home/sammy/Maildir/:
cur  new  tmp

/home/sammy/Maildir/cur:

/home/sammy/Maildir/new:
1463177269.Vfd01I40e4dM691221.mail.example.com

/home/sammy/Maildir/tmp:
Managing Mail with the Client
Use the client to check your mail:
- mail
Output
s-nail version v14.8.6.  Type ? for help.
"/home/sammy/Maildir": 1 message 1 new
>N  1 sammy@example.com     Wed Dec 31 19:00   14/369   init
Output
[-- Message  1 -- 14 lines, 369 bytes --]:
From sammy@example.com Wed Dec 31 19:00:00 1969
Date: Fri, 13 May 2016 18:07:49 -0400
To: sammy@example.com
Subject: init
Message-Id: <20160513220749.A278F228D9@mail.example.com>
From: sammy@example.com

init
- h
Output
s-nail version v14.8.6.  Type ? for help.
"/home/sammy/Maildir": 1 message 1 new
>R  1 sammy@example.com     Wed Dec 31 19:00   14/369   init
- d
- q
Sending Mail with the Client
You can test sending mail by typing a message in a text editor:
- nano ~/test_message
~/test_message
Hello,

This is a test.  Please confirm receipt!
cat command, we can pipe the message to the mail process. This will send the message as your Linux user by default. You can adjust the "From" field with the -r flag if you want to modify that value to something else:
- cat ~/test_message | mail -s 'Test email subject line' -r from_field_account user@email.com
-s: The subject line of the email-r: An optional change to the "From:" field of the email. By default, the Linux user you are logged in as will be used to populate this field. The-roption allows you to override this.user@email.com: The account to send the email to. Change this to be a valid account you have access to.
mail client. Start the interactive client again by typing:
- mail
- file +sent
Conclusion
You should now have Postfix configured on your Ubuntu 16.04 server. Managing email servers can be a tough task for beginning administrators, but with this configuration, you should have basic MTA email functionality to get you started.26 January 2019
How Install Docker and Learn Basic Container Manipulation in CentOS and RHEL 7/6 – Part 1
How Install Docker and Learn Basic Container Manipulation in CentOS and RHEL 7/6
This tutorial provides a starting point on how to install Docker, create and run Docker containers on CentOS/RHEL 7/6, but barley scratches the surface of Docker.Step 1: Install and Configure Docker
1. Docker binaries are incorporated into RHEL/CentOS 7 extras repositories, the installation process being pretty simple. Install Docker package by issuing the following command with root privileges:Install Docker on RHEL and CentOS 7
# yum install docker
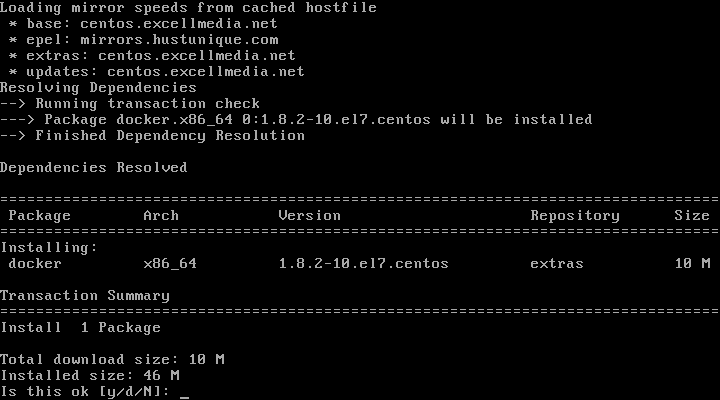
Install Docker on CentOS and RHEL 7
Install Docker on RHEL and CentOS 6
To install Docker, the Epel repositories must be enabled on your system by issuing the following command:# yum install epel-release # yum install docker-io
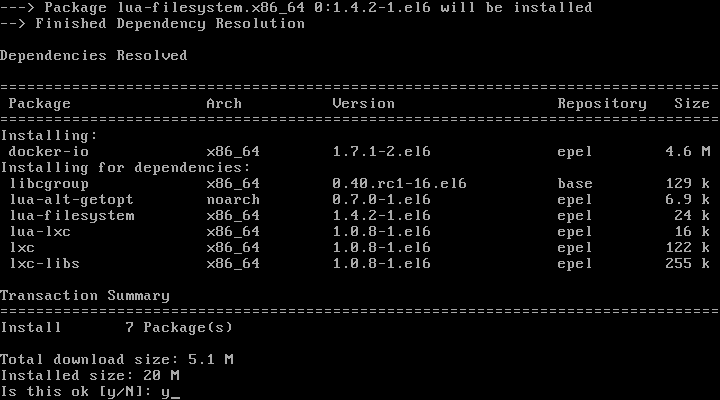
Install Docker on RHEL and CentOS 6
On RHEL/CentOS 7
# systemctl start docker
# systemctl status docker
# systemctl enable docker
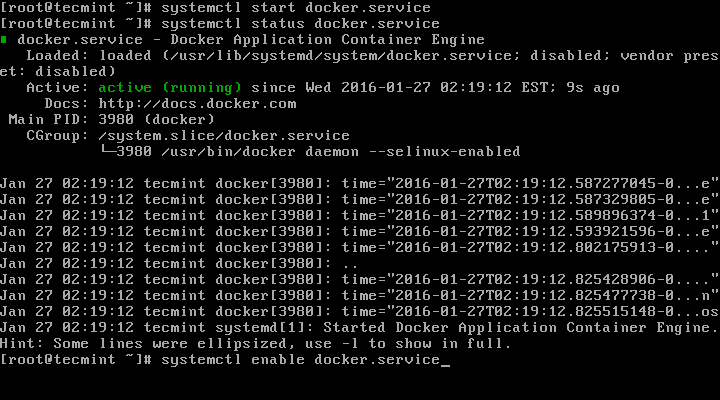
Enable Docker on RHEL and CentOS 7
On RHEL/CentOS 6
# service docker start
# service docker status
# chkconfig docker on
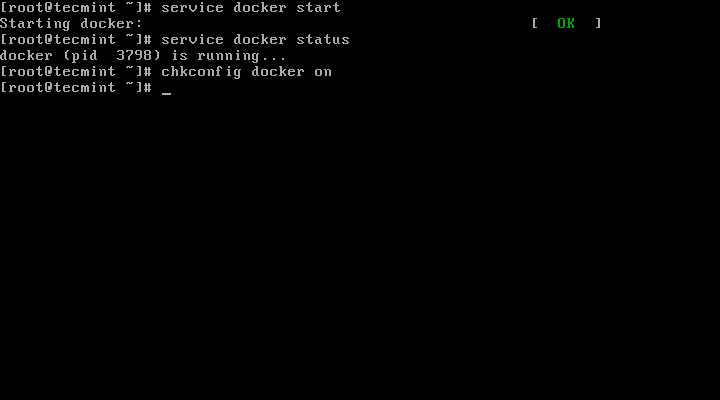
Enable Docker on RHEL and CentOS 6
# docker run hello-world
If you can see the below message, then everything is in the right place.
"Hello from Docker. This message shows that your installation appears to be working correctly."
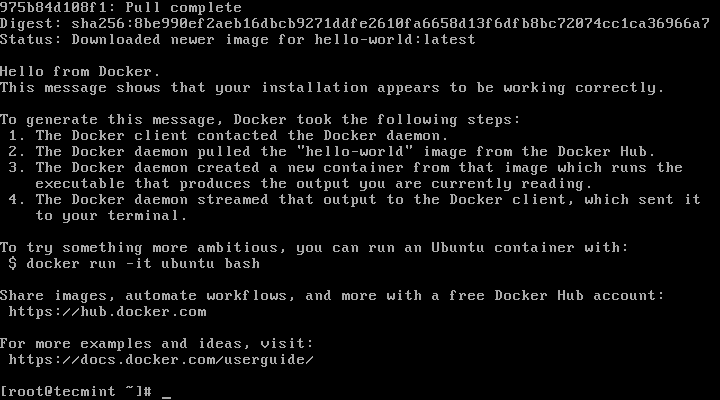
Docker Hello World
For system-wide information on Docker
# docker info
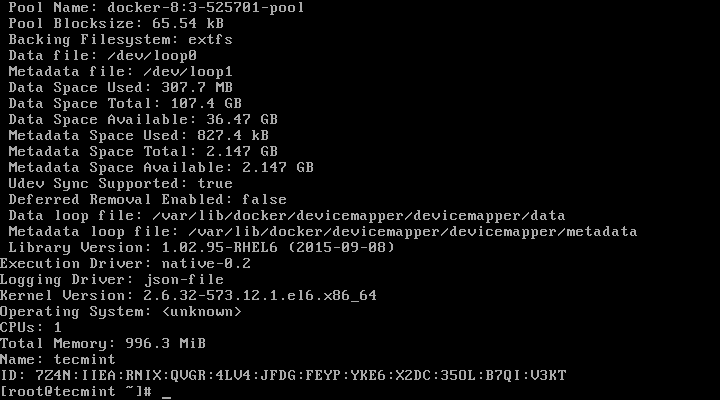
Check Docker Info
For Docker version
# docker version
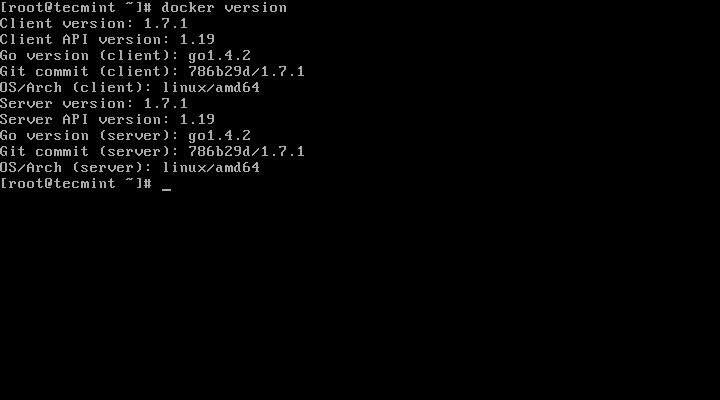
Check Docker Version
# docker
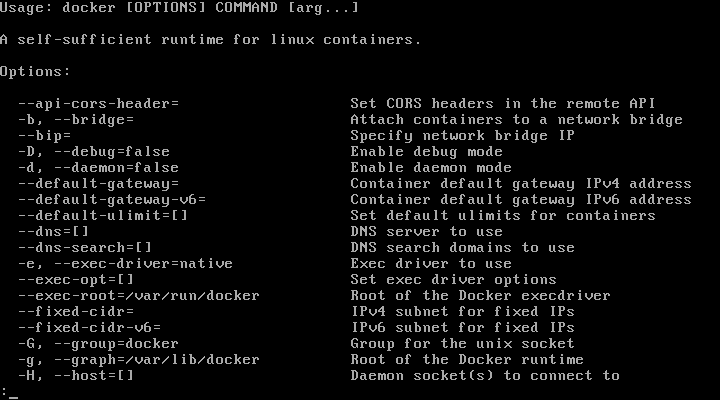
List Docker Commands
Step 2: Download a Docker Image
6. In order to start and run a Docker container, first an image must be downloaded from Docker Hub on your host. Docker Hub offers a great deal of free images from its repositories.To search for a Docker image, Ubuntu for instance, issue the following command:
# docker search ubuntu
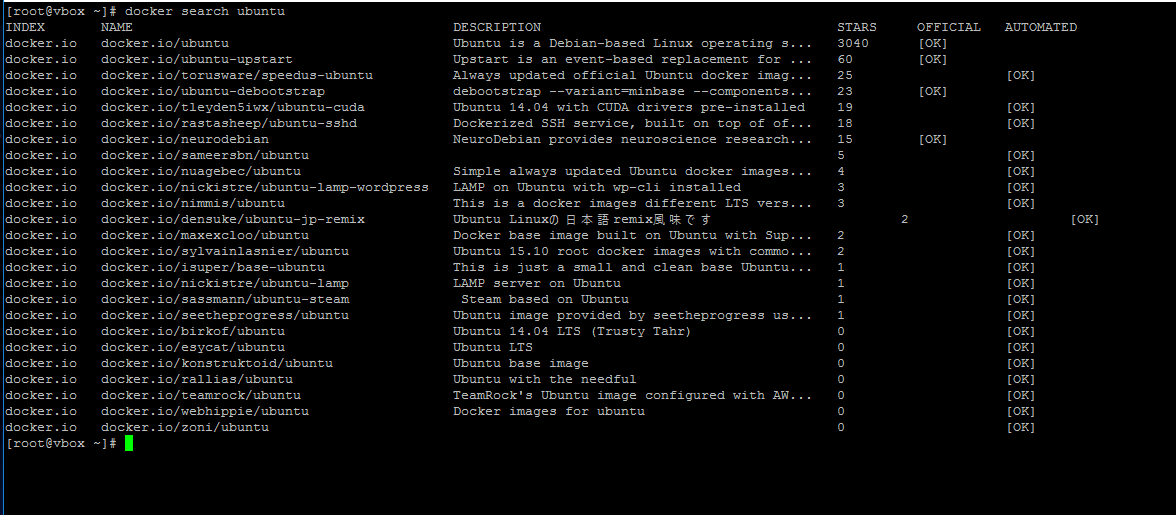
Search Docker Images
# docker pull ubuntu

Download Docker Images
# docker images
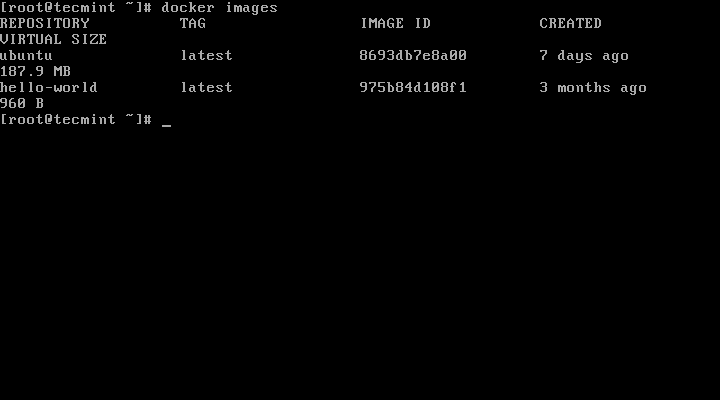
List Docker Images
# docker rmi ubuntu
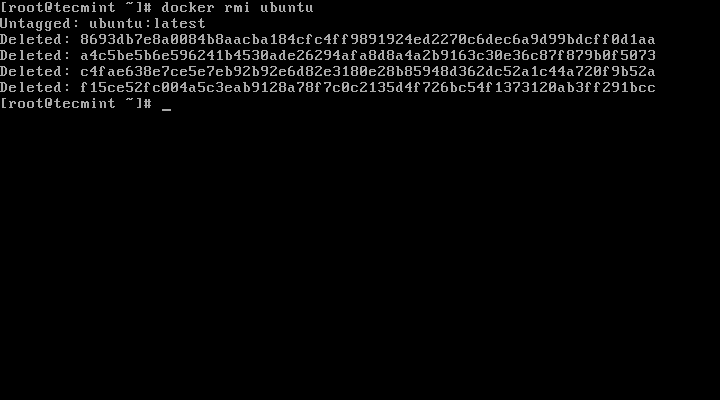
Remove Docker Image
Step 3: Run a Docker Container
When you execute a command against an image you basically obtain a container. After the command that is executing into container ends, the container stops (you get a non-running or exited container). If you run another command into the same image again a new container is created and so on.All the containers created will remain on the host filesystem until you choose to delete them by using the
docker rm command.10. In order to create and run a container, you need to run a command into a downloaded image, in this case Ubuntu, so a basic command would be to display the distribution version file inside the container using cat command, as in the following example:
# docker run ubuntu cat /etc/issue
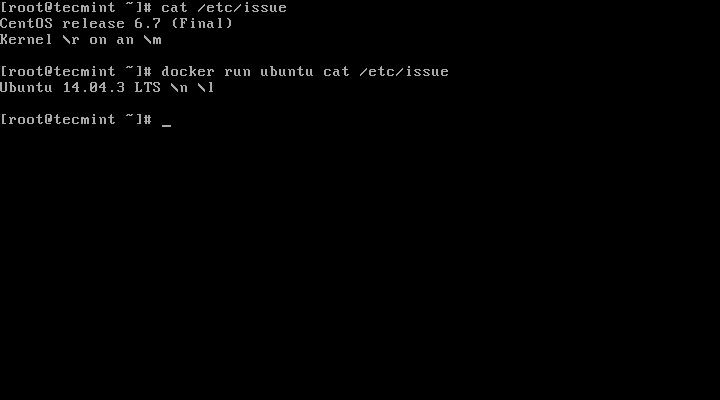
Run Docker Containers
# docker run [local image] [command to run into container]
11. To run one of the containers again with the command that was executed to create it, first you must get the container ID (or the name automatically generated by Docker) by issuing the below command, which displays a list of the running and stopped (non-running) containers:
# docker ps -l
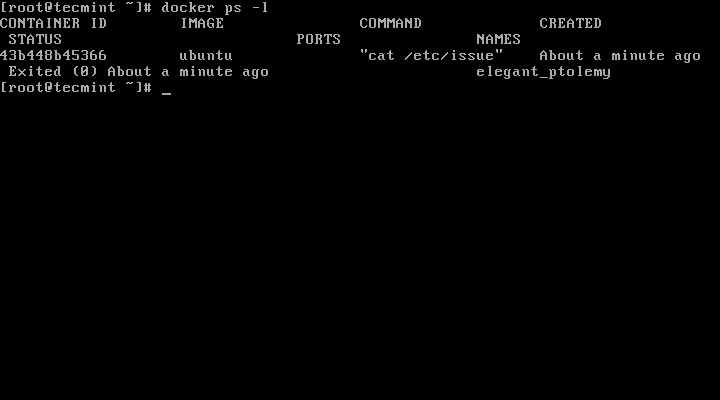
List Running Docker Containers
# docker start c629b7d70666
Here, the string
c629b7d70666 represents the container ID.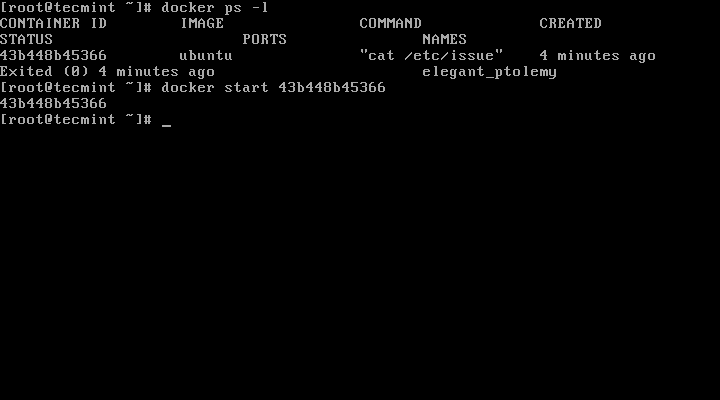
Start Docker Containers
docker ps command. To stop the running container issue docker stop command by specifying the container ID or auto-generated name.# docker stop dreamy_mccarthy
# docker ps

Start Stop Docker Containers
would be to allocate a unique name for every container you create by using the
--name option on command line, as in the following example:# docker run --name myname ubuntu cat /etc/debian_version
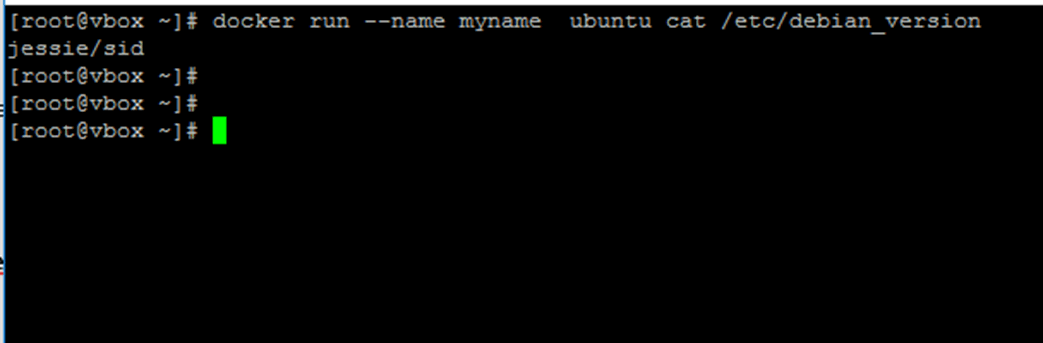
Add Name to Docker Container
# docker start myname
# docker stats myname
# docker top myname
Be aware that some of the above commands might display no output if the process of command that was used to create the container finishes. When the process that runs inside the container finishes, the container stops.
Step 4: Run an Interactive Session into a Container
16. In order to interactively connect into a container shell session, and run commands as you do on any other Linux session, issue the following command:# docker run -it ubuntu bash
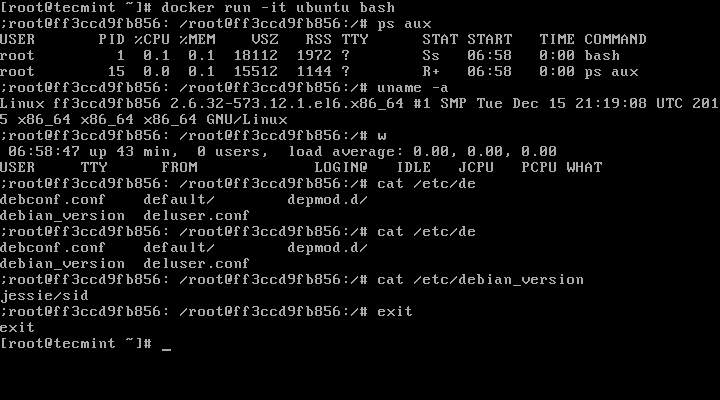
Start Docker Container Interactive Shell
-iis used to start an interactive session.- -t allocates a tty and attaches stdin and stdout.
ubuntuis the image that we used to create the container.bash(or /bin/bash) is the command that we are running inside the Ubuntu container.
exit command. The exit command terminates all the container processes and stops it.# exit
18. If you’re interactively logged on container terminal prompt and you need to keep the container in running state but exit from the interactive session, you can quit the console and return to host terminal by pressing
Ctrl+p and Ctrl+q keys.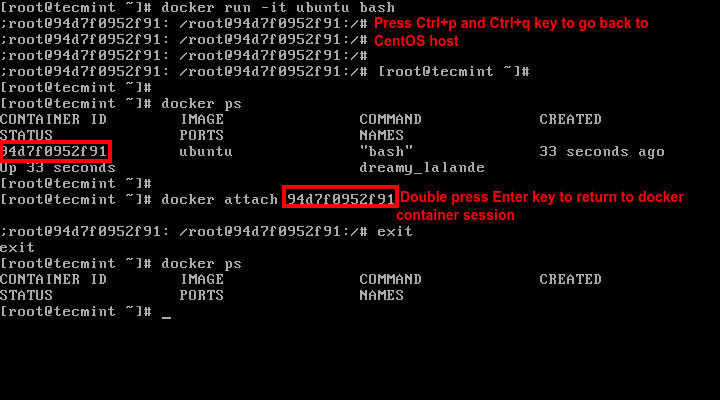
Keep Docker Shell Session Active
docker ps command to get the ID or name and, then, run docker attach command by specifying container ID or name, as illustrated in the image above:# docker attach <container id>20. To stop a running container from the host session issue the following command:
# docker kill <container id>
NodeJS Frameworks for Developers in 2019
NodeJS Frameworks for Developers
Node.js is used to build fast, highly scalable network applications based on an event-driven non-blocking input/output model, single-threaded asynchronous programming.A web application framework is a combination of libraries, helpers, and tools that provide a way to effortlessly build and run web applications. A web framework lays out a foundation for building a web site/app.
The most important aspects of a web framework are – its architecture and features (such as support for customization, flexibility, extensibility, security, compatibility with other libraries, etc..).
Read Also: Install Latest Nodejs and NPM Version in Linux Systems
1. Express.JS
Express is a popular, fast, minimal and flexible Model-View-Controller (MVC) Node.js framework that offers a powerful collection of features for web and mobile application development. It is more or less the de facto API for writing web applications on top of Node.js.It’s a set of routing libraries that provides a thin layer of fundamental web application features that add to the lovely existing Node.js features. It focuses on high performance and supports robust routing, and HTTP helpers (redirection, caching, etc). It comes with a view system supporting 14+ template engines, content negotiation, and an executable for generating applications quickly.
In addition, Express comes with a multitude of easy to use HTTP utility methods, functions and middleware, thus enabling developers to easily and quickly write robust APIs. Several popular Node.js frameworks are built on Express (you will discover some of them as you continue reading).
2. Socket.io
Socket.io is a fast and reliable full stack framework for building realtime applications. It is designed for real-time bidirectional event-based communication.It comes with support for auto-reconnection, disconnection detection, binary, multiplexing, and rooms. It has a simple and convenient API and works on every platform, browser or device(focusing equally on reliability and speed).
3. Meteor.JS
Third on the list is Meteor.js, an ultra-simple full stack Node.js framework for building modern web and mobile applications. It is compatible with the web, iOS, Android, or desktop.It integrates key collections of technologies for building connected-client reactive applications, a build tool, and a curated set of packages from the Node.js and general JavaScript community.
4. Koa.JS
Koa.js is a new web framework built by the developers behind Express and uses ES2017 async functions. It’s intended to be a smaller, more expressive, and more robust foundation for developing web applications and APIs. It employs promises and async functions to rid apps of callback hell and simplify error handling.To understand the difference between Koa.js and Express.js, read this document: koa-vs-express.md.
5. Sails.js
Sailsjs is a realtime MVC web development framework for Node.js built on Express. Its MVC architecture resembles that from frameworks such as Ruby on Rails. However, it’s different in that it supports for the more modern, data-driven style of web app and API development.It supports auto-generated REST APIs, easy WebSocket integration, and is compatible with any front-end: Angular, React, iOS, Android, Windows Phone, as well as custom hardware.
6. MEAN.io
MEAN (in full Mongo, Express, Angular(6) and Node) is a collection of open source technologies that together, provide an end-to-end framework for building dynamic web applications from the ground up.It aims to provide a simple and enjoyable starting point for writing cloud native fullstack JavaScript applications, starting from the top to the bottom. It is another Node.js frameworks built on Express.
7. Nest.JS
Nest.js is a flexible, versatile and progressive Node.js REST API framework for building efficient, reliable and scalable server-side applications. It uses modern JavaScript and it’s built with TypeScript. It combines elements of OOP (Object Oriented Programming), FP (Functional Programming), and FRP (Functional Reactive Programming).It’s an out-of-the-box application architecture packaged into a complete development kit for writing enterprise-level applications. Internally, it employs Express while providing compatibility with a wide range of other libraries.
8. Loopback.io
LoopBack is a highly-extensible Node.js framework that enables you to create dynamic end-to-end REST APIs with little or no coding. It is designed to enable developers to easily set up models and create REST APIs in a matter of minutes.It supports easy authentication and authorization setup. It also comes with model relation support, various backend data stores, Ad-hoc queries and add-on components (third-party login and storage service).
9. Keystone.JS
KeystoneJS is an open source, lightweight, flexible and extensible Nodejs full-stack framework built on Express and MongoDB. It is designed for building database-driven websites, applications and APIs.It supports dynamic routes, form processing, database building blocks (IDs, Strings, Booleans, Dates and Numbers ), and session management. It ships with a beautiful, customizable Admin UI for easily managing your data.
With Keystone, everything is simple; you choose and use the features that suit your needs, and replace the ones that don’t.
10. Feathers.JS
Feathers.js is a real-time, minimal and micro-service REST API framework for writing modern applications. It is an assortment of tools and an architecture designed for easily writing scalable REST APIs and real-time web applications from scratch. It is also built on Express.It allows for quickly building application prototypes in minutes and production ready real-time backends in days. It easily integrates with any client side framework, whether it be Angular, React, or VueJS. Furthermore, it supports flexible optional plugins for implementing authentication and authorization permissions in your apps. Above all, feathers enables you to write elegant, flexible code.
11. Hapi.JS
Hapi.js is a simple yet rich, stable and reliable MVC framework for building applications and services. It is intended for writing reusable application logic as opposed to building infrastructure. It is configuration-centric and offers features such as input validation, caching, authentication, and other essential facilities.12. Strapi.io
Strapi is a fast, robust and featured-rich MVC Node.js framework for developing efficient and secure APIs for web sites/apps or mobile applications. Strapi is secure by default and it’s plugins oriented (a set of default plugins is provided in every new project) and front-end agnostic.It ships in with an embedded elegant, entirely customizable and fully extensible admin panel with headless CMS capabilities for keeping control of your data.
13. Restify.JS
Restify is a Nodejs REST API framework which utilizes connect style middleware. Under the hood, it heavily borrows from Express. It is optimized (especially for introspection and performance) for building semantically correct RESTful web services ready for production use at scale.Importantly, restify is being used to power a number of huge web services out there, by companies such as Netflix.
14. Adonis.JS
Adonisjs is another popular Node.js web framework that is simple and stable with an elegant syntax. It is a MVC framework that provides a stable ecosystem to write stable and scalable server-side web applications from scratch. Adonisjs is modular in design; it consists of multiple service providers, the building blocks of AdonisJs applications.A consistent and expressive API allows for building full-stack web applications or micro API servers. It is designed to favor developer joy and there is a well documented blog engine to learn the basics of AdonisJs.
Other well known Nodejs frameworks include but not limited to SocketCluster.io (full stack), Nodal (MVC), ThinkJS (MVC), SocketStreamJS (full stack), MEAN.JS (full stack), Total.js (MVC), DerbyJS (full-stack), and Meatier (MVC).
Subscribe to:
Comments (Atom)

Popular Posts
-
Best Web Hosting Companies for Linux If you are a website administrator, developer, or designer (or perhaps the three of them), you pr...

